Before you start
This page explains how to complete each stage of the Student Registration Exercise. Find how to create a new Student Registration Account if you have not already done this.
Starting the Student Registration Exercise
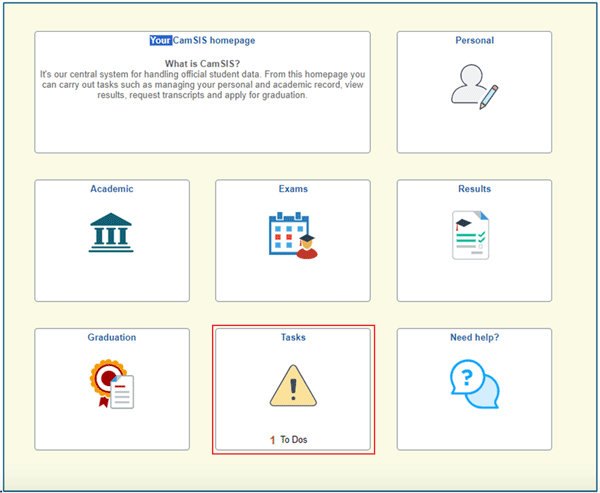
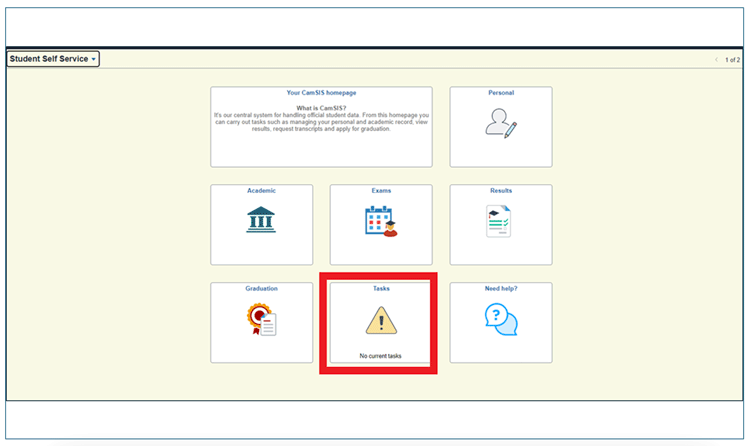
When you first log in to the Student Registration Exercise, you will see a selection of tiles. You will see a note on the ‘Tasks’ tile telling you there is ‘1 To Do’.
Select the Tasks tile. The next screen is the ‘To Do List’.
Select 'Student Registration' from the Task list.
You will be taken through a series of questions. You will either need to confirm the details are correct or submit a change request if the information is incorrect. On some questions you will be asked to choose an option from a drop-down list. To move through the screens, click ‘Next’.
Step 1: Introduction
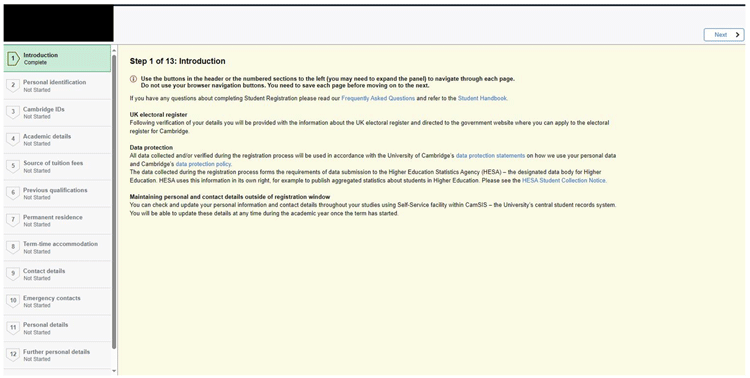
The first page contains an introduction to Registration.
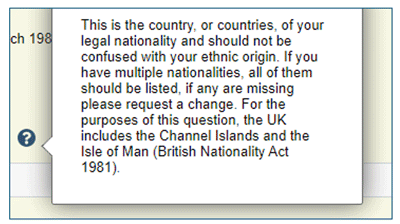
Clicking on the question mark icon on any screen will bring up additional information if you require extra help.
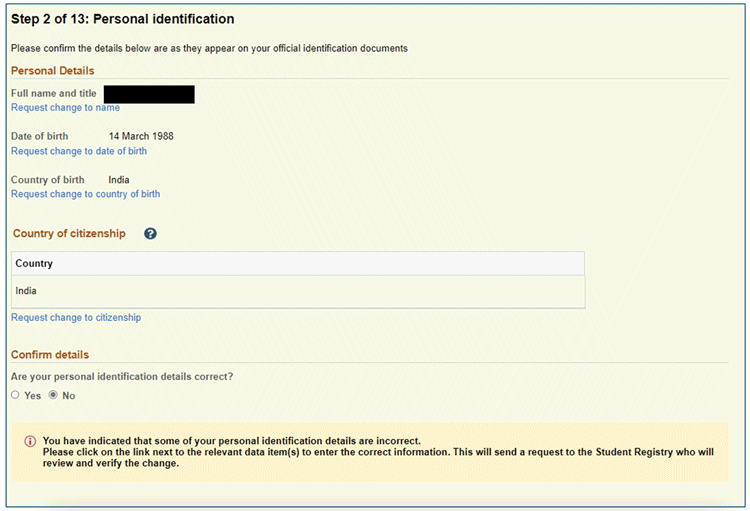
To indicate that any information is incorrect, select the ‘No’ button. You will be asked which information is not correct and be asked to request a change to the information held.
Step 2: Personal identification
This page ask you about your name, date of birth and country of citizenship.
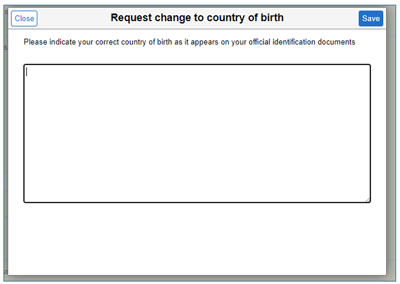
Click on the ‘Request a change to….’ link and it will bring up a box where you can enter the change you wish to make.
Enter the change you wish to make and click ‘Save’. This will send a change request to the Student Registry.
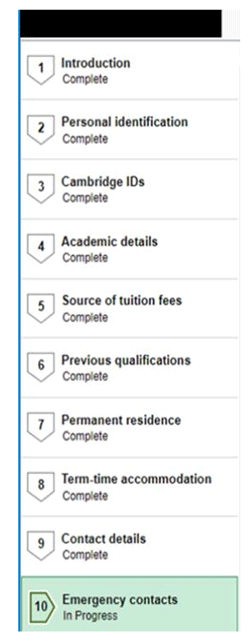
Throughout the registration exercise you will see a menu on the left of the screen telling you the status of each question. It is either 'Not started', 'In progress' or 'Complete'.
You will not be able to move to the next screen until you confirm the information is correct or submit a change request. Select ‘Save' once you have reviewed all the information. At this point the ‘Next’ button will appear.
Step 3: Cambridge IDs
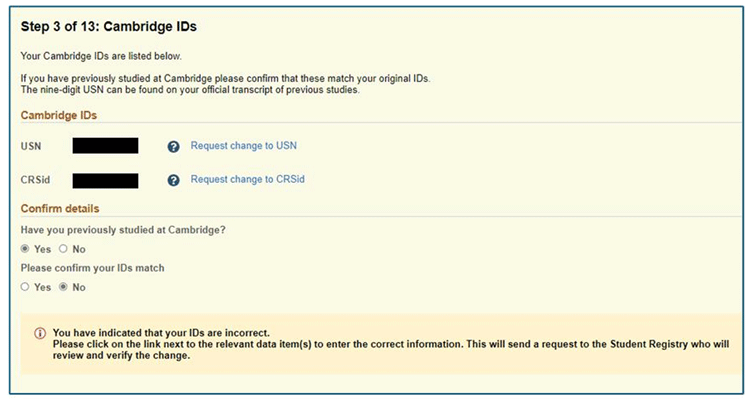
This page asks you about Cambridge IDs.
If you have not previously studied at Cambridge you can select ‘No’, Save and then click the next button.
If you have previously studied at Cambridge, then select ‘Yes’ and you will be asked to confirm that the IDs on the screen match your previous IDs.
If they match, then click ‘Yes’ and then save. If they do not click ‘No’ and request the change required. Then click 'Save' and move on.
Step 4: Academic details
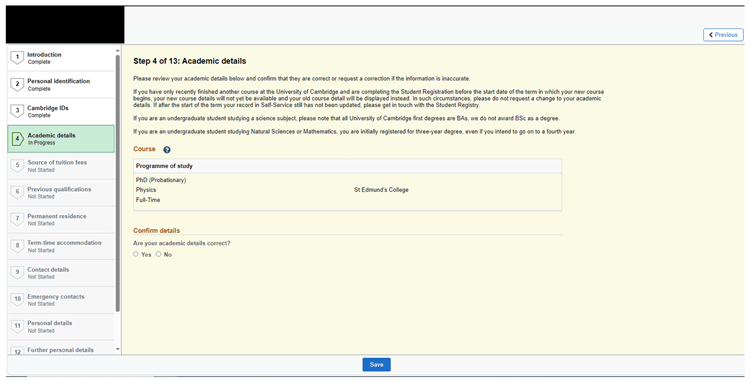
The next page relates to the Academic details we hold for you. Please read the information at the start of this page that explains this is more detail.
As before, if the information is correct click ‘Yes’ and save or if you require a change click ‘No’, enter the change then save and move on to the next screen.
Step 5: Source of tuition fees
This question ask who is funding your course of study.
Once you have selected the right option for you, click 'Save' and move on to the next question.
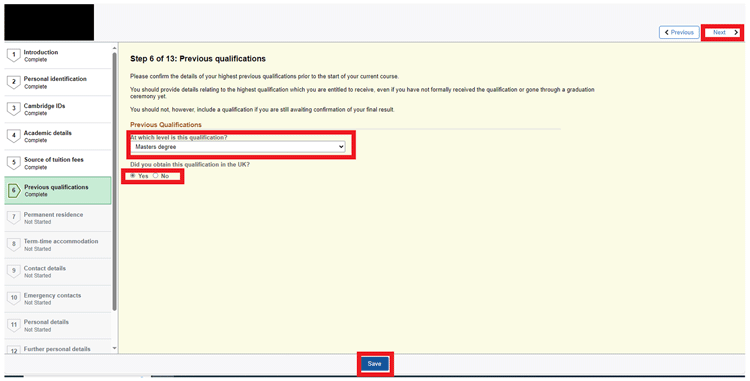
Step 6: Previous qualifications
Next, will be asked about your previous qualifications.
Answer this question, save, and move on to the next question.
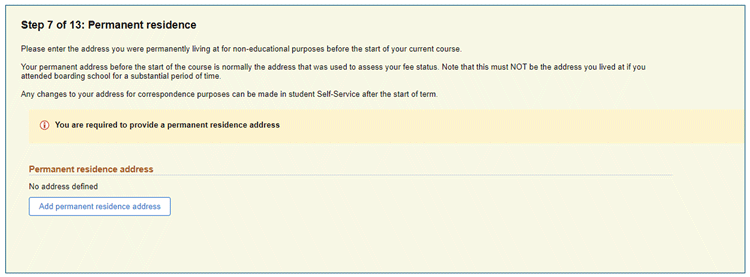
Step 7: Permanent residence
This question relates to your Permanent Residence. Please read the information at the start of the page. All new students will need to add a permanent residence address.
Click the ‘Add permanent residence address button.
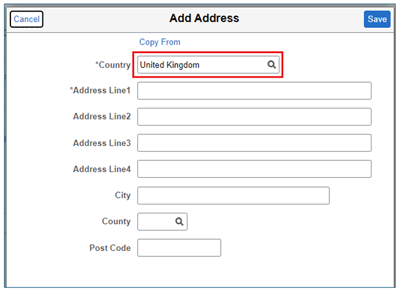
Add the address, ensuring you select the correct country at the beginning.
When the address is entered you can click ‘Save’ and move on to the next question.
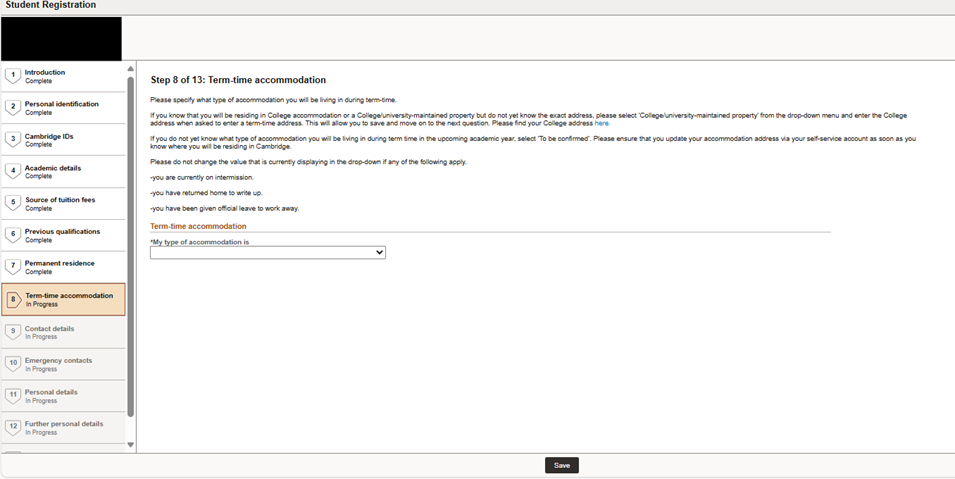
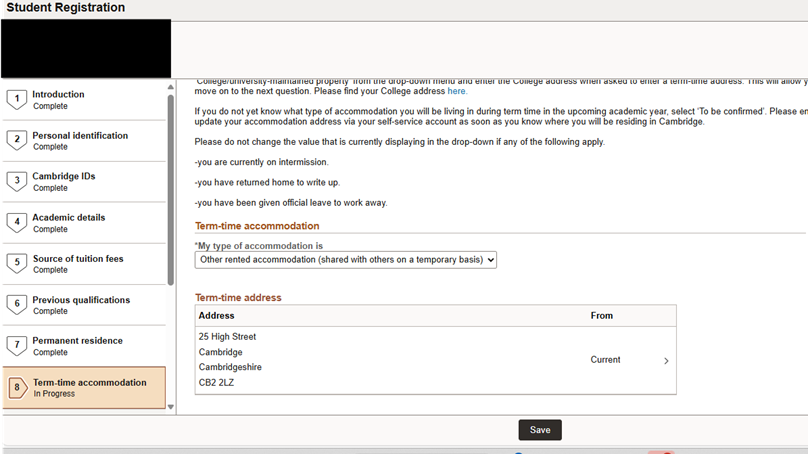
Step 8: Term-time accommodation
This is about your term-time accommodation. Please read the instructions carefully.
Note, you will only be asked this question is you are a full-time student as we do not need a term time address for part time students.
First you need to select the type of term time accommodation you will be living in. Then you will need to add your term time address.
Click save and move on to the next question.
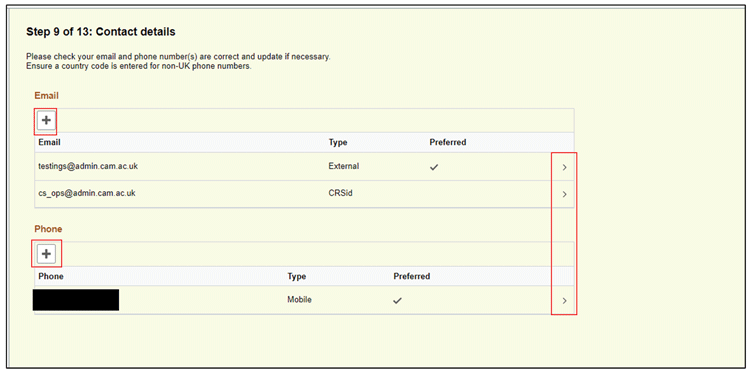
Step 9: Contact details
This page asks you to review the email address and phone number that we hold for you. If any changes need to be made you can click the arrow next to the item.
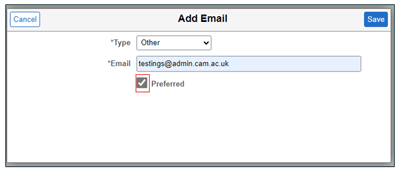
To add a new item, click the + button. To make an email address your ‘preferred’ email address simply tick the preferred box.
When the details are all correct, click save and move on to the next question.
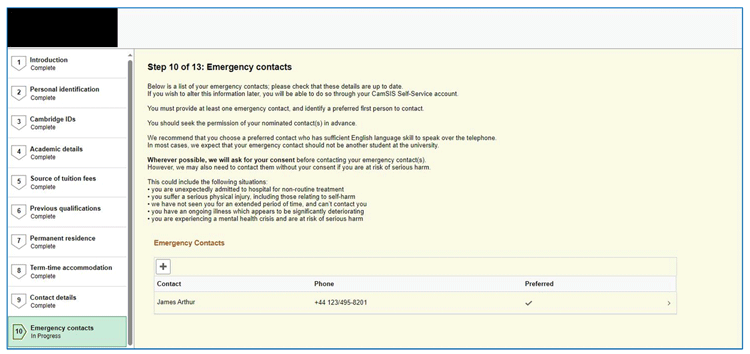
Step 10: Emergency contacts
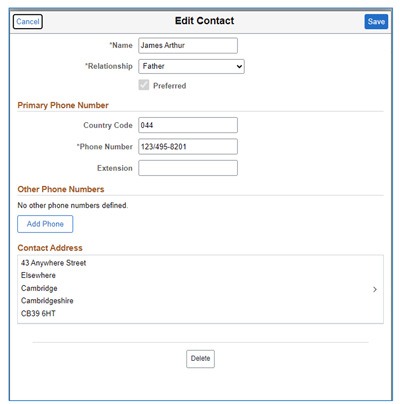
Read the information and add additional emergency contacts if required by clicking the + button. If any changes need to be made you can click the arrow next to the item.
You can amend the details or delete an emergency contact.
When all items are correct click 'Save' and move on to the next question.
Step 11: Personal details
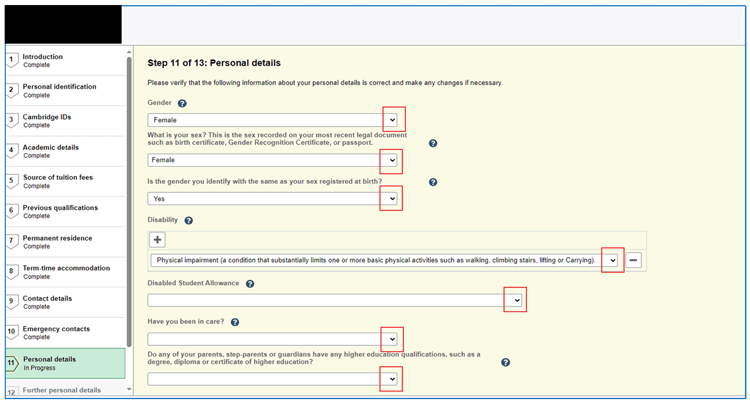
The next two questions ask about personal information. Click the ‘?’ for more details. To make a selection click on the down arrow.
If you have a disability, then you will need to let us know if you are in receipt of Disabled Students Allowance. This box is greyed out if you do not declare a disability.
When you are happy with your answers click 'Save' and move to the next question,
Step 12: Further personal details
This page asks you about ethnicity, sexual orientation and religion or beliefs.
When you have selected the right details, click 'Save' and move on.
Step 13: Submission
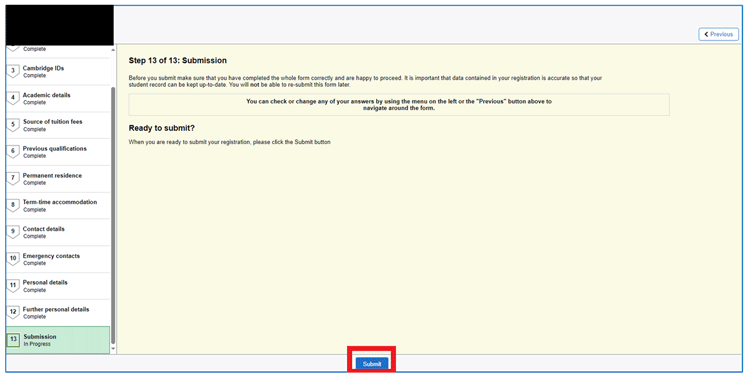
This page is the submission page. We recommend that you go back through and check your answers before submitting your registration response.
When you are ready, click ‘Submit’.
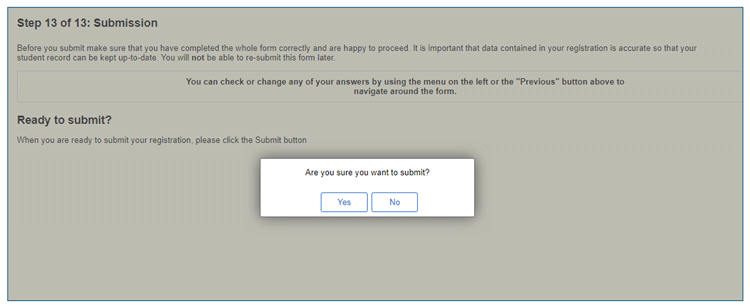
You will be asked if you are sure you wish to submit. If you are happy, click ’Yes’.
Collecting your IT accounts
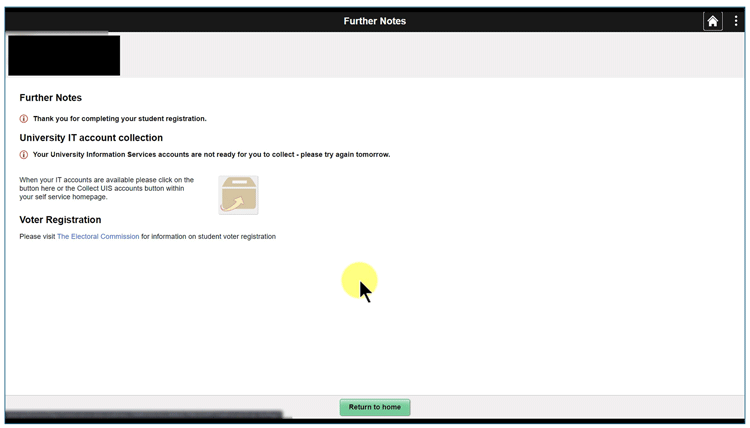
Finally, you will see a page that lets you know if you University IT account is ready for collection. Find out more about collecting your IT accounts.
If you return to your self-service page, you will see that you no longer have any tasks to complete.

